


Which screen protector should I buy?
There are few different types available, so here’s what to look out for when choosing one:
- PET type – made from semi-hard, clear plastic. They’re extremely durable and are one of the most common types available.
- Glass type – made from clear tempered glass. Very hard and smooth to use. They’ll have a plastic layer that holds everything together in case of any damage.
- Soft vinyl plastic type – these can be cheaper and more tempting, but they’re usually not very pleasant to use and can peel easily.
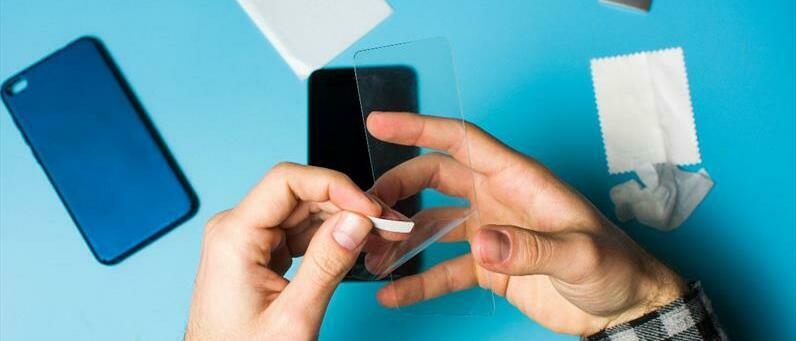
Applying a screen protector without an applicator
Some screen protectors come with applicators. If yours doesn’t, these steps will help you get it spot on.
Before you start, you need to:
- Set things up in a clean, dust-free environment
- Wash your hands, then make sure they’re completely dry
- Clean the screen with rubbing alcohol or screen cleaner, then make sure it’s dry
- Check the placement of the screen protector by positioning it over your screen (before you remove the backing) and check how much space needs to be left on each side. You should also look out for any camera or mic holes.
- Do a final dust check, this will be the thing that can ruin your hard work. Dabbing the sticky part of a post-it note on the screen can help remove any residue.
- Carefully align the edge of the screen protector, then peel off the backing from one end. When you’re happy with the margins, peel off the entire back and smooth the protector over the screen. You can use a cloth to make sure it’s properly applying as you peel.
- Sometimes, little bits of dust can find their way under the screen protector, no matter how careful you are. But if it’s barely noticeable, we’d suggest that you leave it alone. You could do more damage trying to fix it. If there’s a big speck that you just can’t ignore, you can try gently lifting it and ‘fishing’ with a bit of scotch tape or a sticky note, just be careful to leave the adhesive intact.
- You can get rid of any air bubbles with a firm, smooth-edge, like the side of a credit card. Try to be gentle as you do it, you don’t want to be scratching it when you’ve just put it on.
Applying a screen protector with an applicator
Here’s how to apply your screen protector if it comes with an applicator. You should still:
- Set things up in a clean, dust-free environment
- Wash your hands, then make sure they’re completely dry
- Clean the screen with rubbing alcohol or screen cleaner, then make sure it’s dry
- The applicator will be built into the packaging – so lift the screen protector out without peeling back any of the adhesive.
- Fit your phone into the applicator. If it doesn’t fit, you might need to exchange it for a different size.
- Give the screen a final clean with the included microfibre cloth.
- Carefully peel off the backing, then pulling the applicator down stick it to the screen.
- Peel back the applicator and remove your phone, and you’re ready to start using it.